Deploying a SIEM For My Home Devices


I'm a hands on learner. Despite all my knowledge on Security Information and Event Management (SIEM) systems and recommending the use of SIEMS, I'd never set up and configured my own until today.
Setting up a SIEM is crucial for monitoring and safeguarding any network, so I chose to set one up at home. This post will walk you through the high level steps I took and I'll link to documentation at the end of the post should you want to try this for yourself.
A quick rundown of what I used for this setup:
SIEM: Wazuh (Open Source SIEM).
Linode: Cloud Computing Provider (Ubuntu Server for the Container).
Docker: Docker was the quickest way to deploy the container application.
Agents: My own Windows & Macbook machines to run the agent.
Getting Started with Linode
I began by creating a Linode account (Linode is a cloud computing provider) and launching an Ubuntu instance. I SSH'd into the server and after updating the repositories I installed Docker and Docker compose:
sudo apt install docker.io docker-compose -y
Deploying Wazuh SIEM with Docker
Next, I pulled and ran the Wazuh Docker container using the git clone from the Wazuh Docker documentation (you must have Git installed for this to work:
git clone https://github.com/wazuh/wazuh-docker.git -b v4.7.2
This created a new directory called wazuh-docker. I CD'd into this directory and then CD'd again into the single-node directory. After that the last step was to run the below docker compose file to generate some self signed certificates:
docker-compose -f generate-indexer-certs.yml run --rm generator
Once the above is finished the last piece of the setup was running the below command to deploy it:
docker-compose up -d
Using the reverse DNS name from Linode I was able to paste that into the browser and open the Wazuh portal in the browser, it was up and running!
Connecting Devices to Wazuh
Connecting devices to the Wazuh SIEM is very easy. The console tab for adding an agent built the command for me as I completed the sections for the FQDN server address, the machine name and the OS. This is probably my favourite feature of Wazuh, it's so easy to deploy the agent. Just bear in mind that you'll need to run PowerShell as administrator for Windows machines.
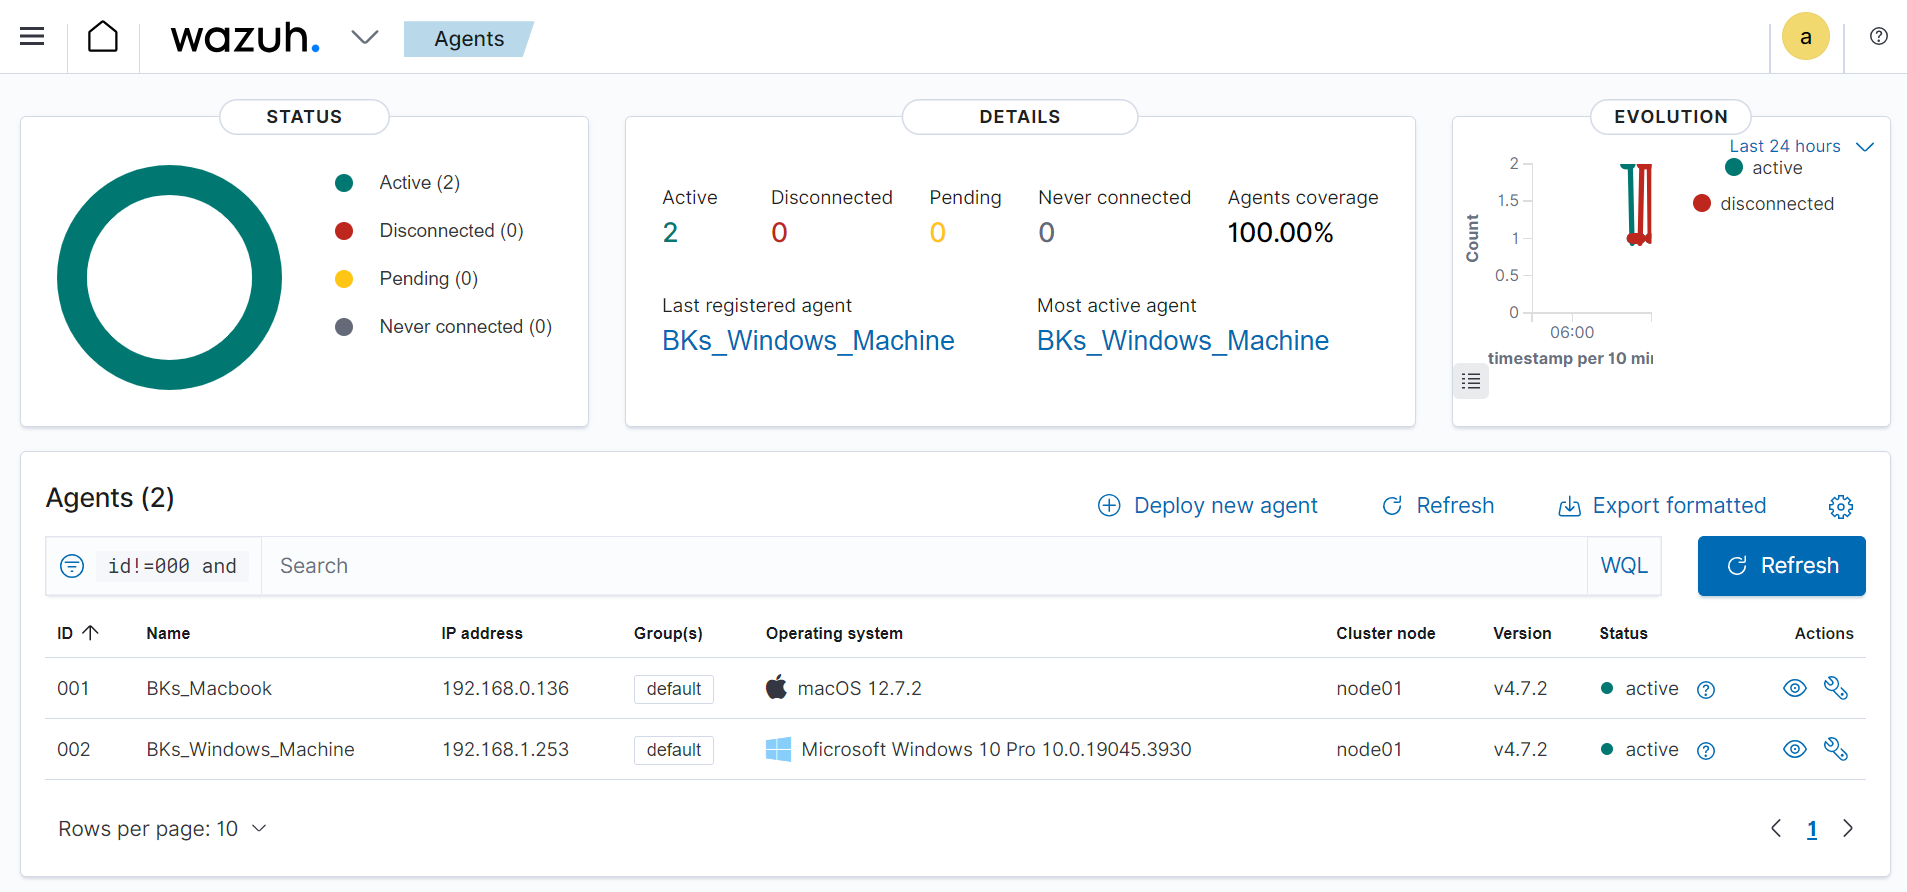
Once I ran those commands I started those services on the devices and they started reporting back to Wazuh within seconds. I even tested powering down the Macbook and watched it disconnect on the portal and display 50% coverage before powering it back. I also wanted to see if I needed a script to start the service or if it would start reporting and it did auto restart which was handy.
Here's the agents dashboard with my machines added:
By selecting the Windows machine for example, Wazuh told me which parts of the MITRE attack framework the machine was vulnerable to, the compliance standards it met such as PCIDSS, GDPR, NIST as well as recent events:

Analyzing Wazuh Alerts
I learned to prioritize and investigate the Wazuh security alerts and scan findings for both of my machines. My Windows machine needed far more work than my Mac which was expected. I learned that some mitigations would have impacted the usability of the machine, especially for the projects I like to use it for so although some improvements were made, I was comfortable accepting the risk for the others.
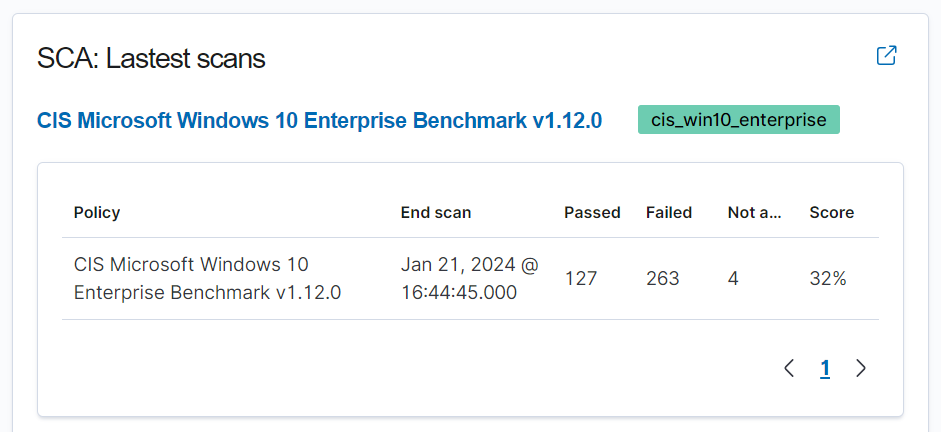
One of my favourite features of the console is the SCA (Security Configuration Assessment) and the score it gives. This is super useful to help prioritize which devices need more attention, I only had two devices to decide on but considering some businesses could have hundreds this becomes a very powerful data driven metric to help with prioritisation.
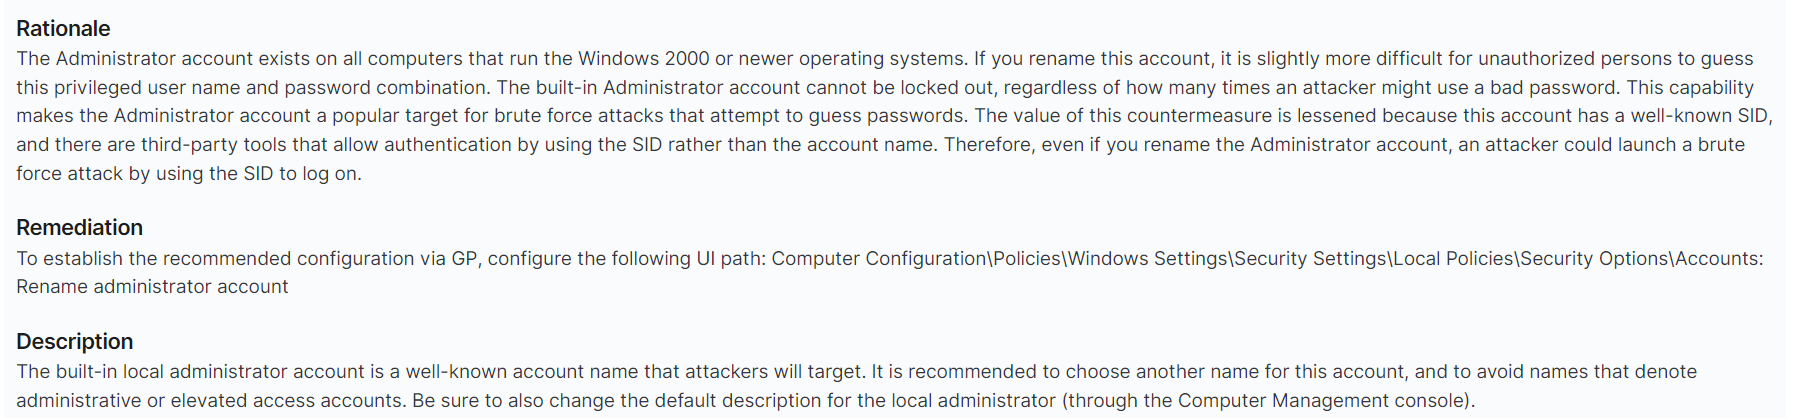
If that wasn't good enough, Wazuh shows the Rationale, Description and even the Remediation for a given vulnerability.
Wazuh has so many different features to play around with but in order to keep this post to a reasonable length, the last thing I set up that I will share was File Integrity Monitoring (FIM). Without going into the details of the setup, there's a file on the host machine called ossec.conf where you edit some fields.
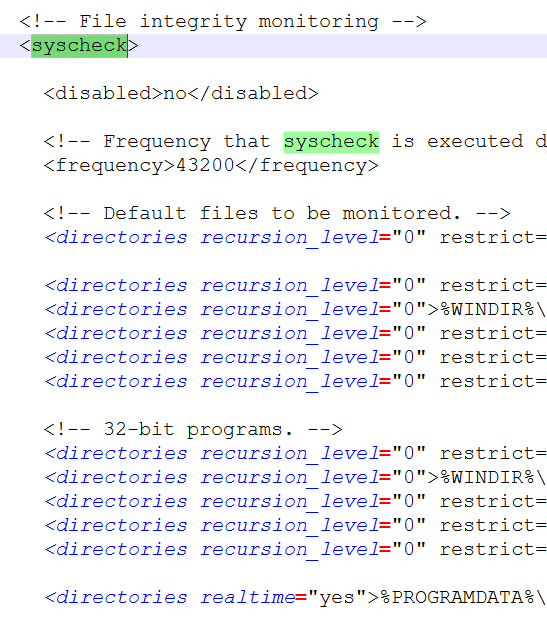
I chose to monitor the desktop on my Windows machine so Wazuh would alert me (pretending it was a crucial part of the machine to monitor and I was a SecOps analyst).
I then set up a real time alert for any changes.

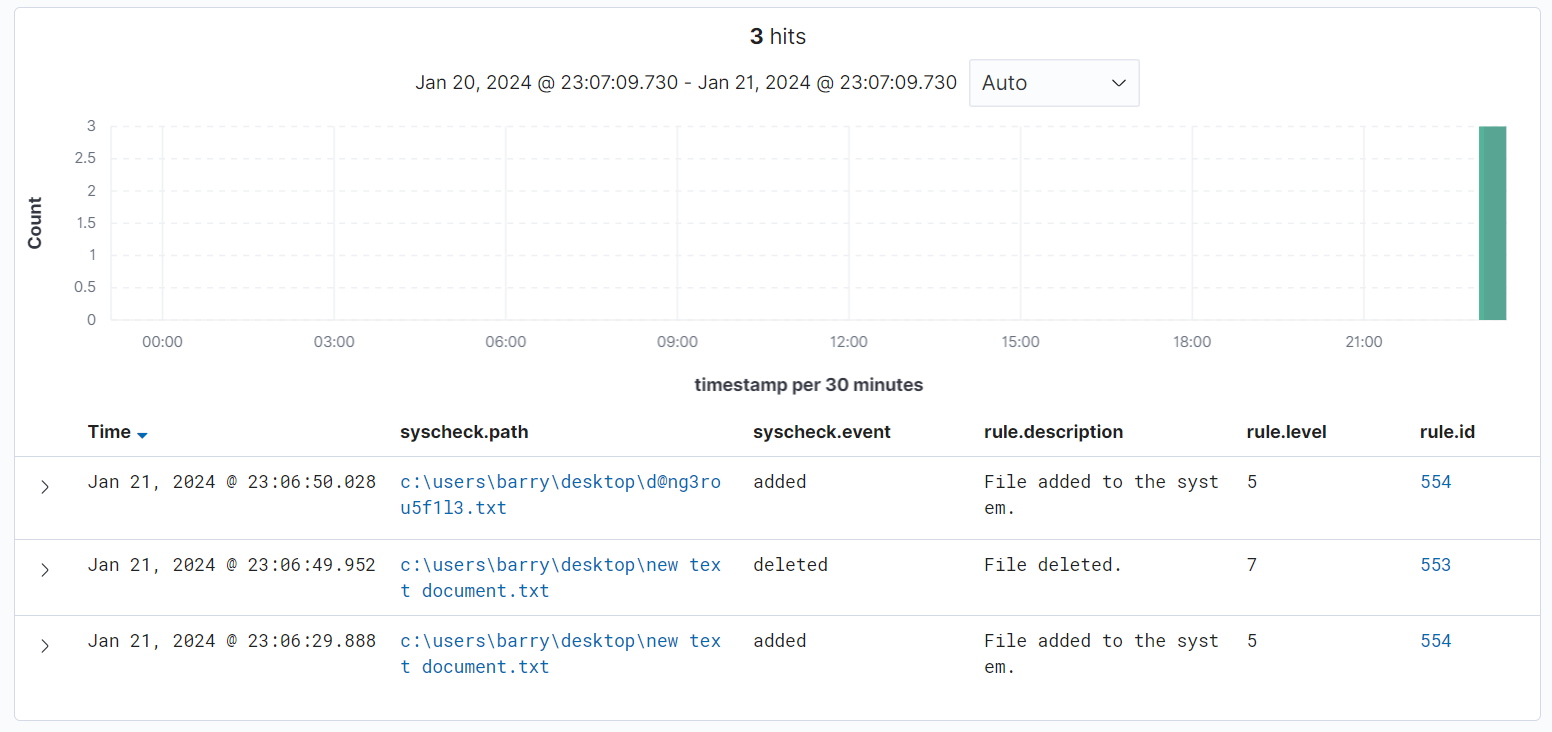
I went to my desktop and added a "dangerous file" in the form of an empty txt file named [email protected] and returned to the console and hit refresh to see the results:
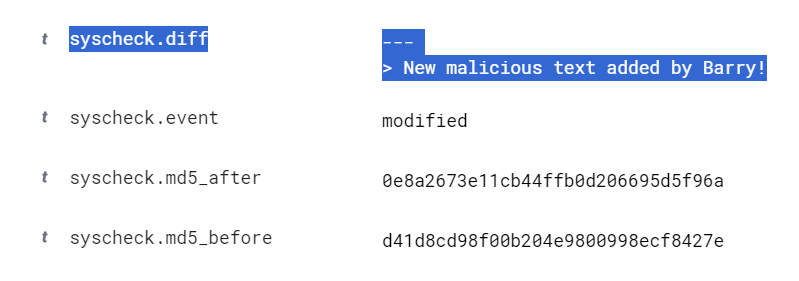
Wazuh would even tell me if the file changed (Integrity checksum changed) and what exactly changed after I edited the text in the file. It even recorded the MD5 hash from before and after the changes:

Conclusion
Overall I'm baffled this tool is free and open source given the features and the well thought out design. It's not perfect, as I ran in to a couple of issues and a high level of effort to change the default admin password for the web UI which was strange for a security product, but it more than does the job and I highly recommend any security professional deploy it and play around with the features.
I now have the skills to set up a SIEM for a business of any size. Longer term, I think I'll add this to my top 10 containers I will run in my home lab for the foreseeable future to monitor my own devices as well as those of my family members.
Share on LinkedInIf you enjoyed this post, please consider supporting my work through the button below or becoming a free subscriber, (it really helps).
If you're a business and would like to discuss consulting services, you can request a free consultation here: https://www.megabytesandme.com/services/
Thank you!